由于之前有接触过 GCP 和 Salesforce 集成相关的项目,但是没有认真的了解过中间的实现细节,那么今天这篇文章主要介绍如何在 Google Cloud 上创建一个 Cloud Function 并认证连接到 Salesforce.
在本篇内容中,我们的挑战主要包括:
- 创建一个 Google Cloud Function
- 使用 Secret Manager 在 GCP 中存储 Salesforce 凭证
- 使用 Cloud Function 与 Salesforce 进行认证,并创建 Salesforce 数据
开始前准备:
Tip: 为了可以使用 Google Cloud Function, 我们需要绑定一张自己的真实信用卡,主要原因是 Google 为了校验操作的不是机器人,过程不会扣任何费用。
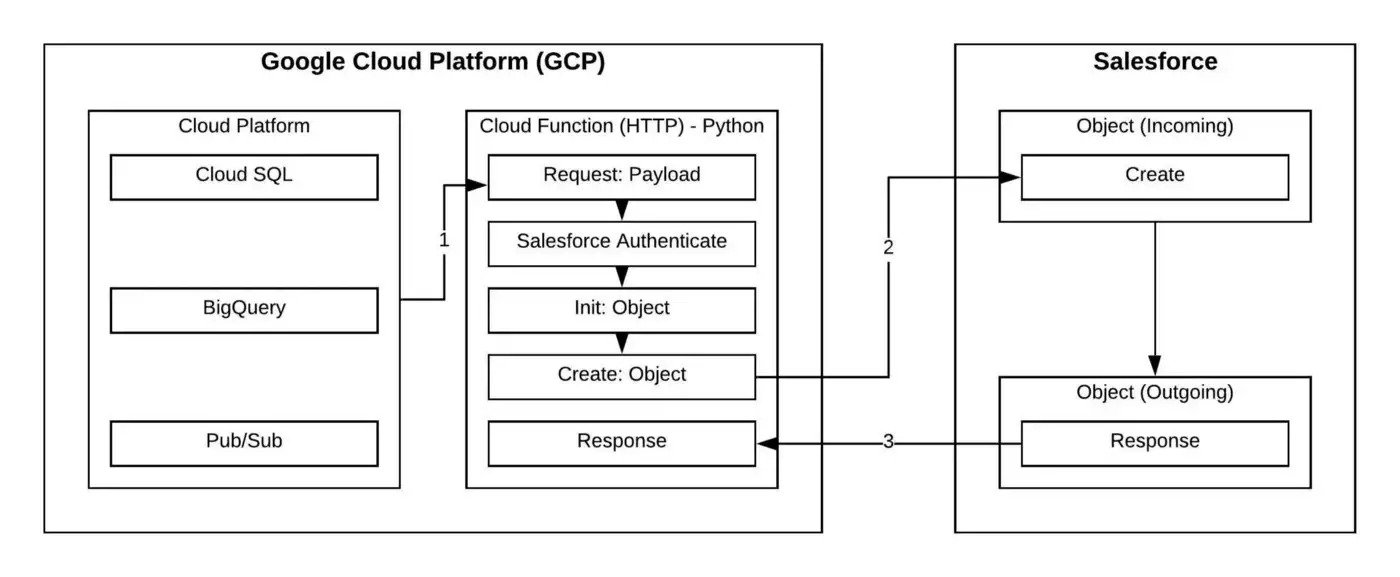
简单的架构示意图:
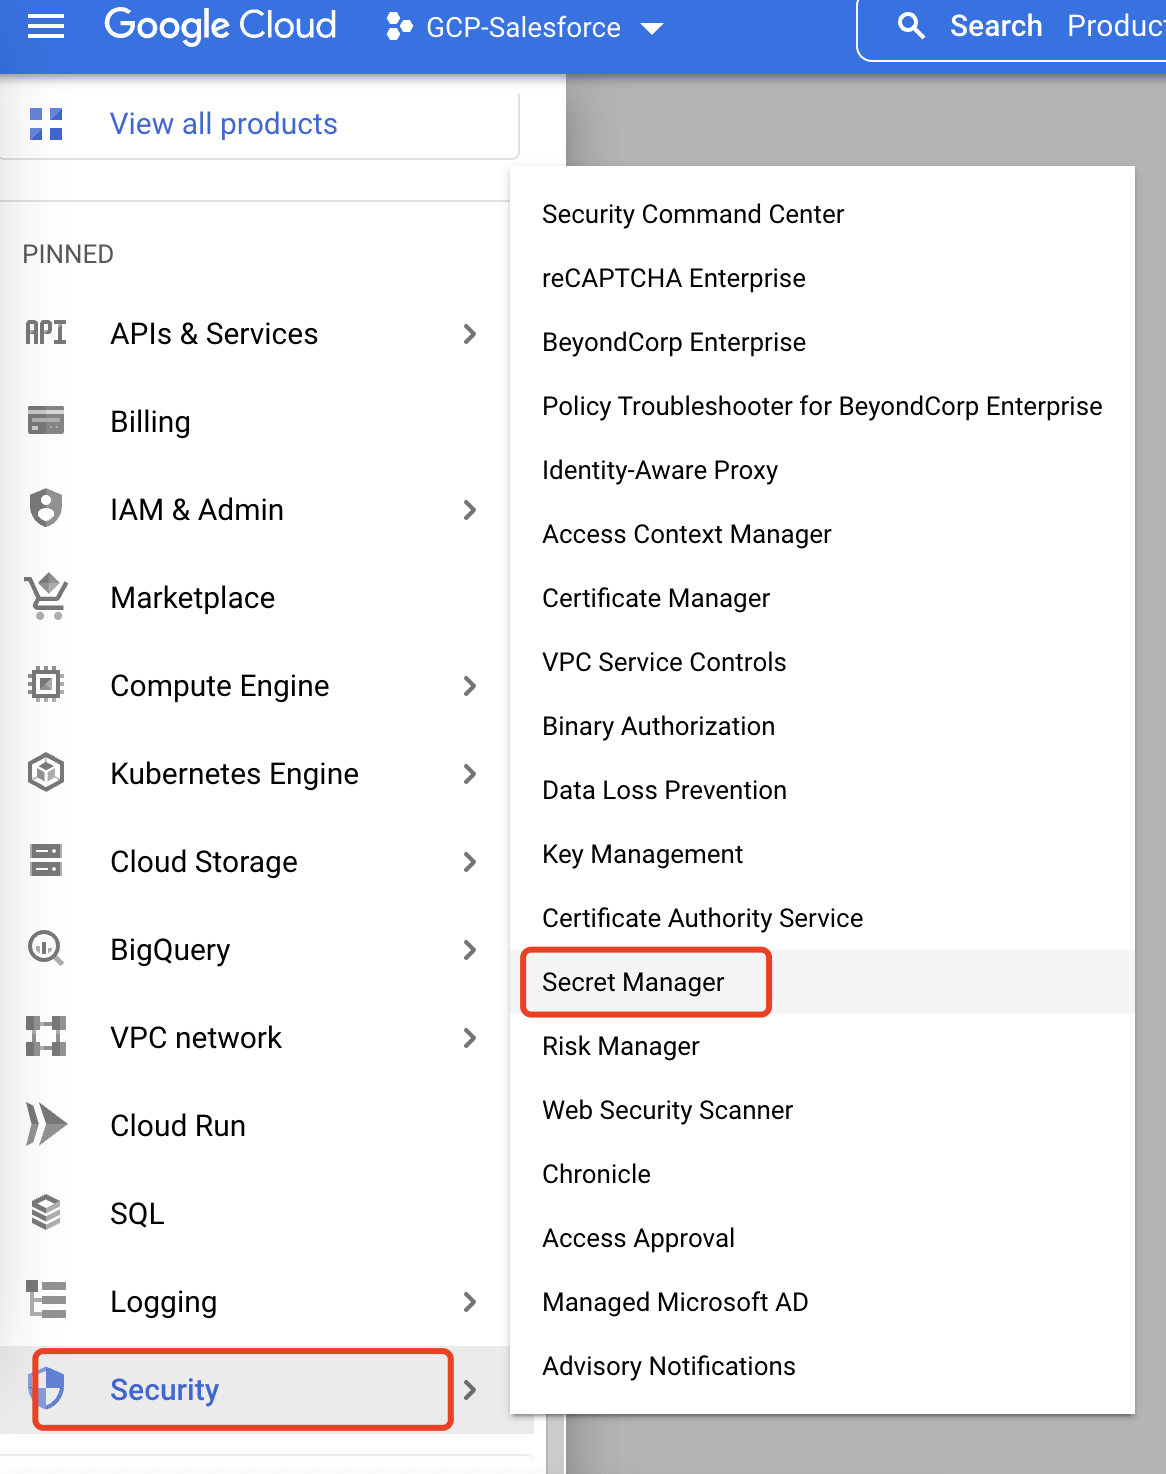
步骤 1. Google Cloud Platform: 启用 Secret Manager
通过 REST API 访问 Salesforce 需要三部分;用户名,密码和 Security Token. 在 GCP 内存储这类信息的最安全选择是 Secret Manager.它允许对这些凭证进行存储和版本控制,以便安全使用。下面介绍如何在 Secret Manager 里设置参数。
步骤:
- 在
google Console界面,选择Security, - 在
Security选择卡中选择Secret Manager, 点击进入详情页
步骤 2. Google Cloud Platform: 创建 Salesforce 凭证
步骤:
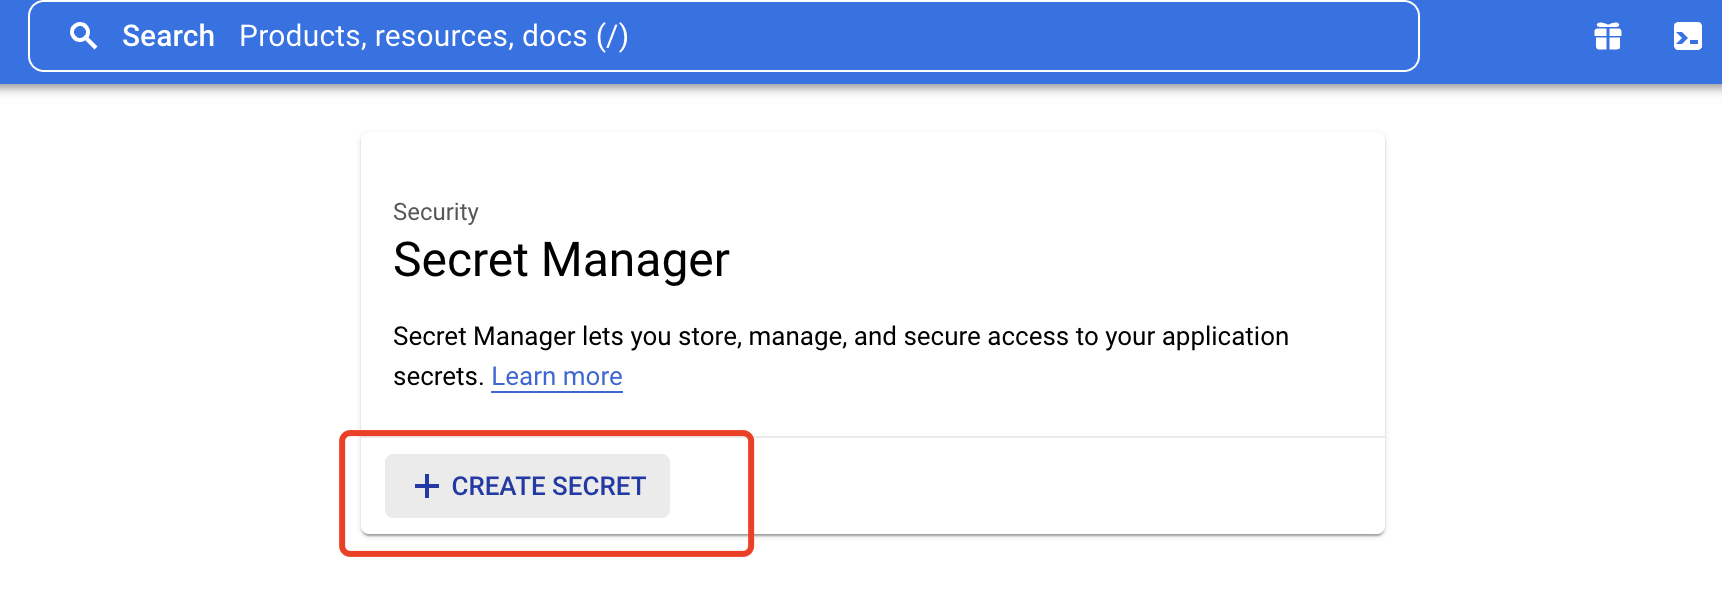
- 在
Secret Manager, 点击CREATE SECRET
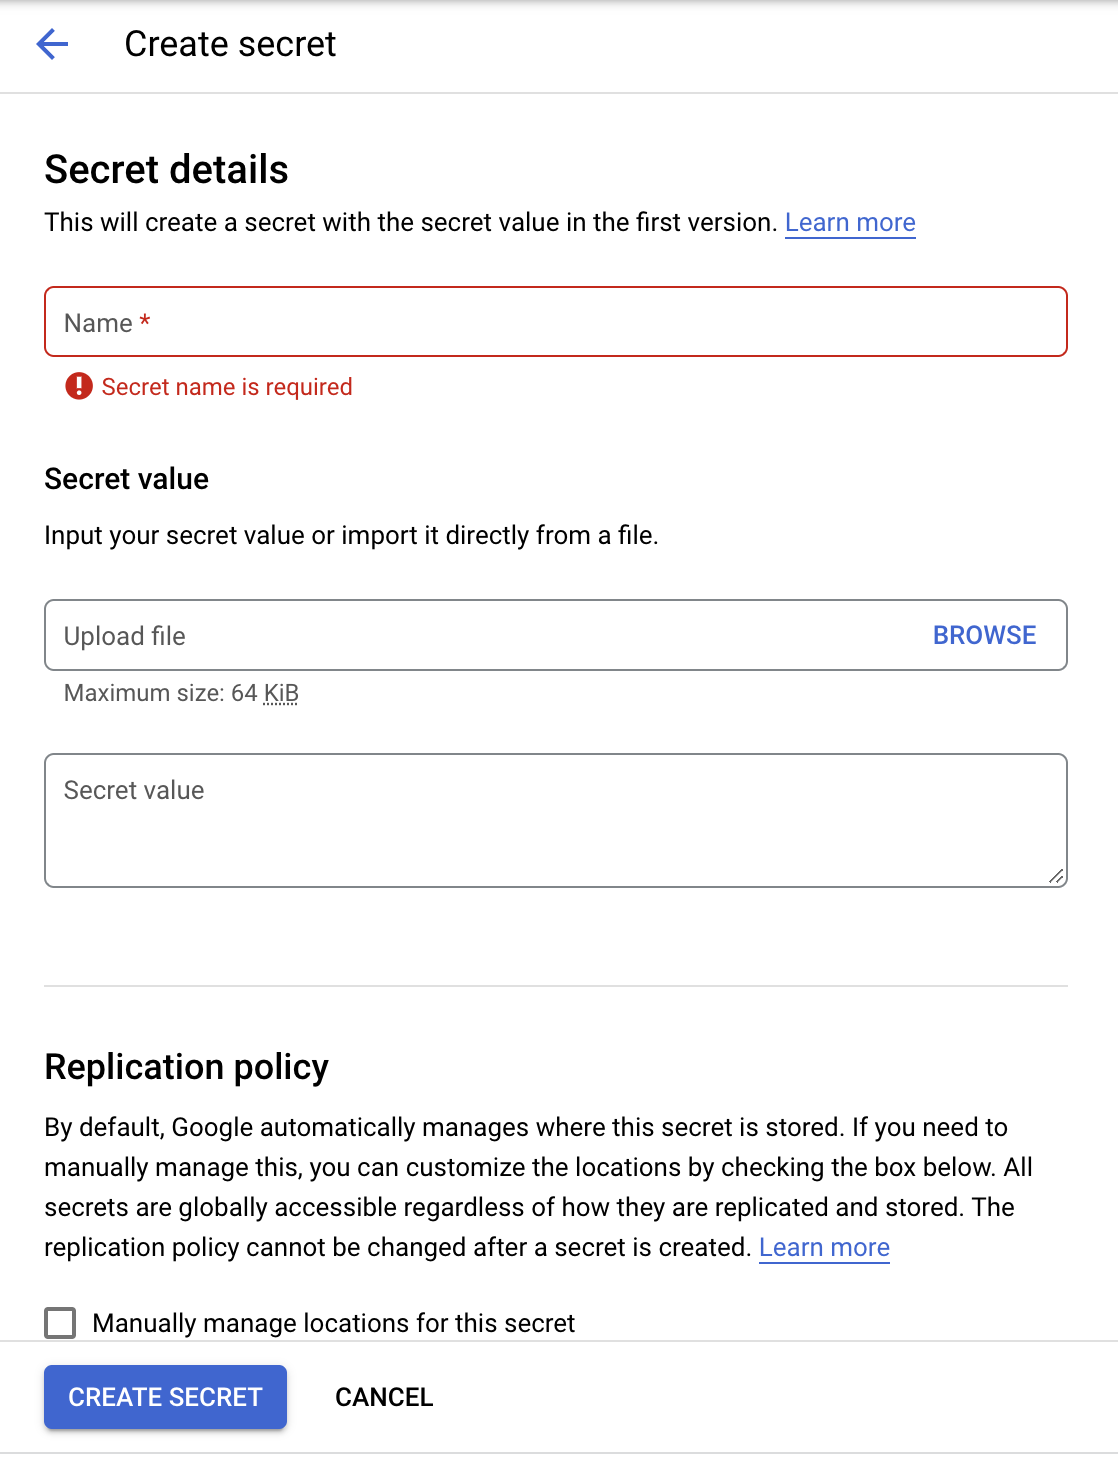
在 CREATE SECRET 页面:
- Name = SF_USER_PROD
- Secret Value =
YOUR@SALESFORCEUSERNAME.com - 点击
Create Secret按钮 - 对于
SF_PASS_PROD和SF_TOKEN_PROD重复上面这些相同的步骤。

步骤 3. Google Cloud Platform: 创建 Google Cloud Function (Python)
现在,Salesforce 凭证已经安全存储,接下来我们将创建一个云函数 (Cloud Function). Cloud Function 是 Serverless,可移植的代码解决方案,在运行时被调用。在创建的这个云函数中,由于谷歌没有与 Salesforce 原生集成,我们必须调用一个名为 Simple Salesforce 的第三方 Python REST API 库。这使得我们可以通过 REST API 使用简化的方法来验证,创建,更新和查询 Salesforce 数据。
步骤:
- 在
google Console界面,选择Cloud Functions,
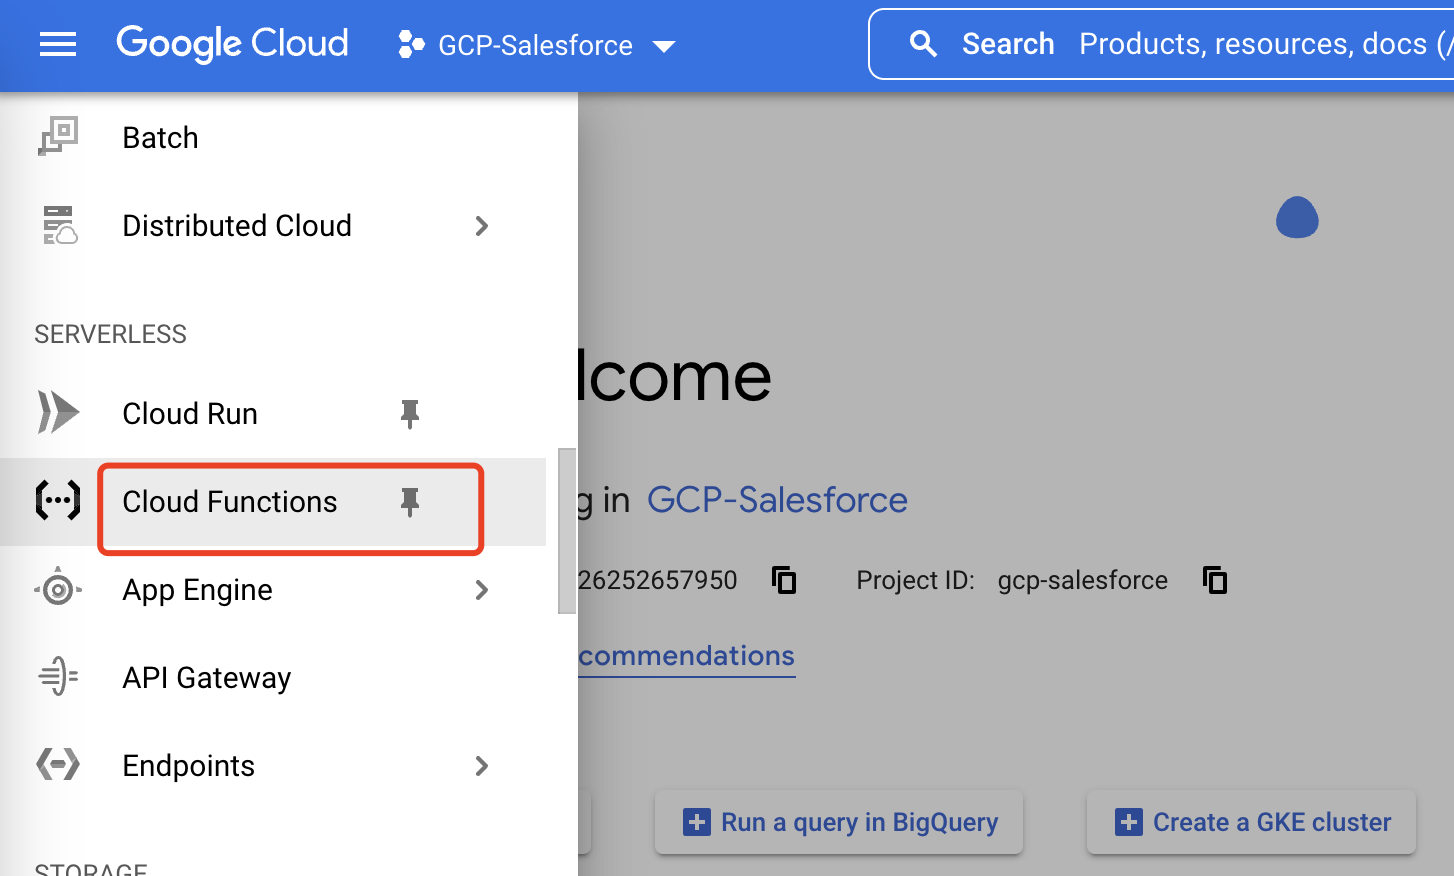
- 在
Cloud Functions界面,点击CLOUD FUNCTION,
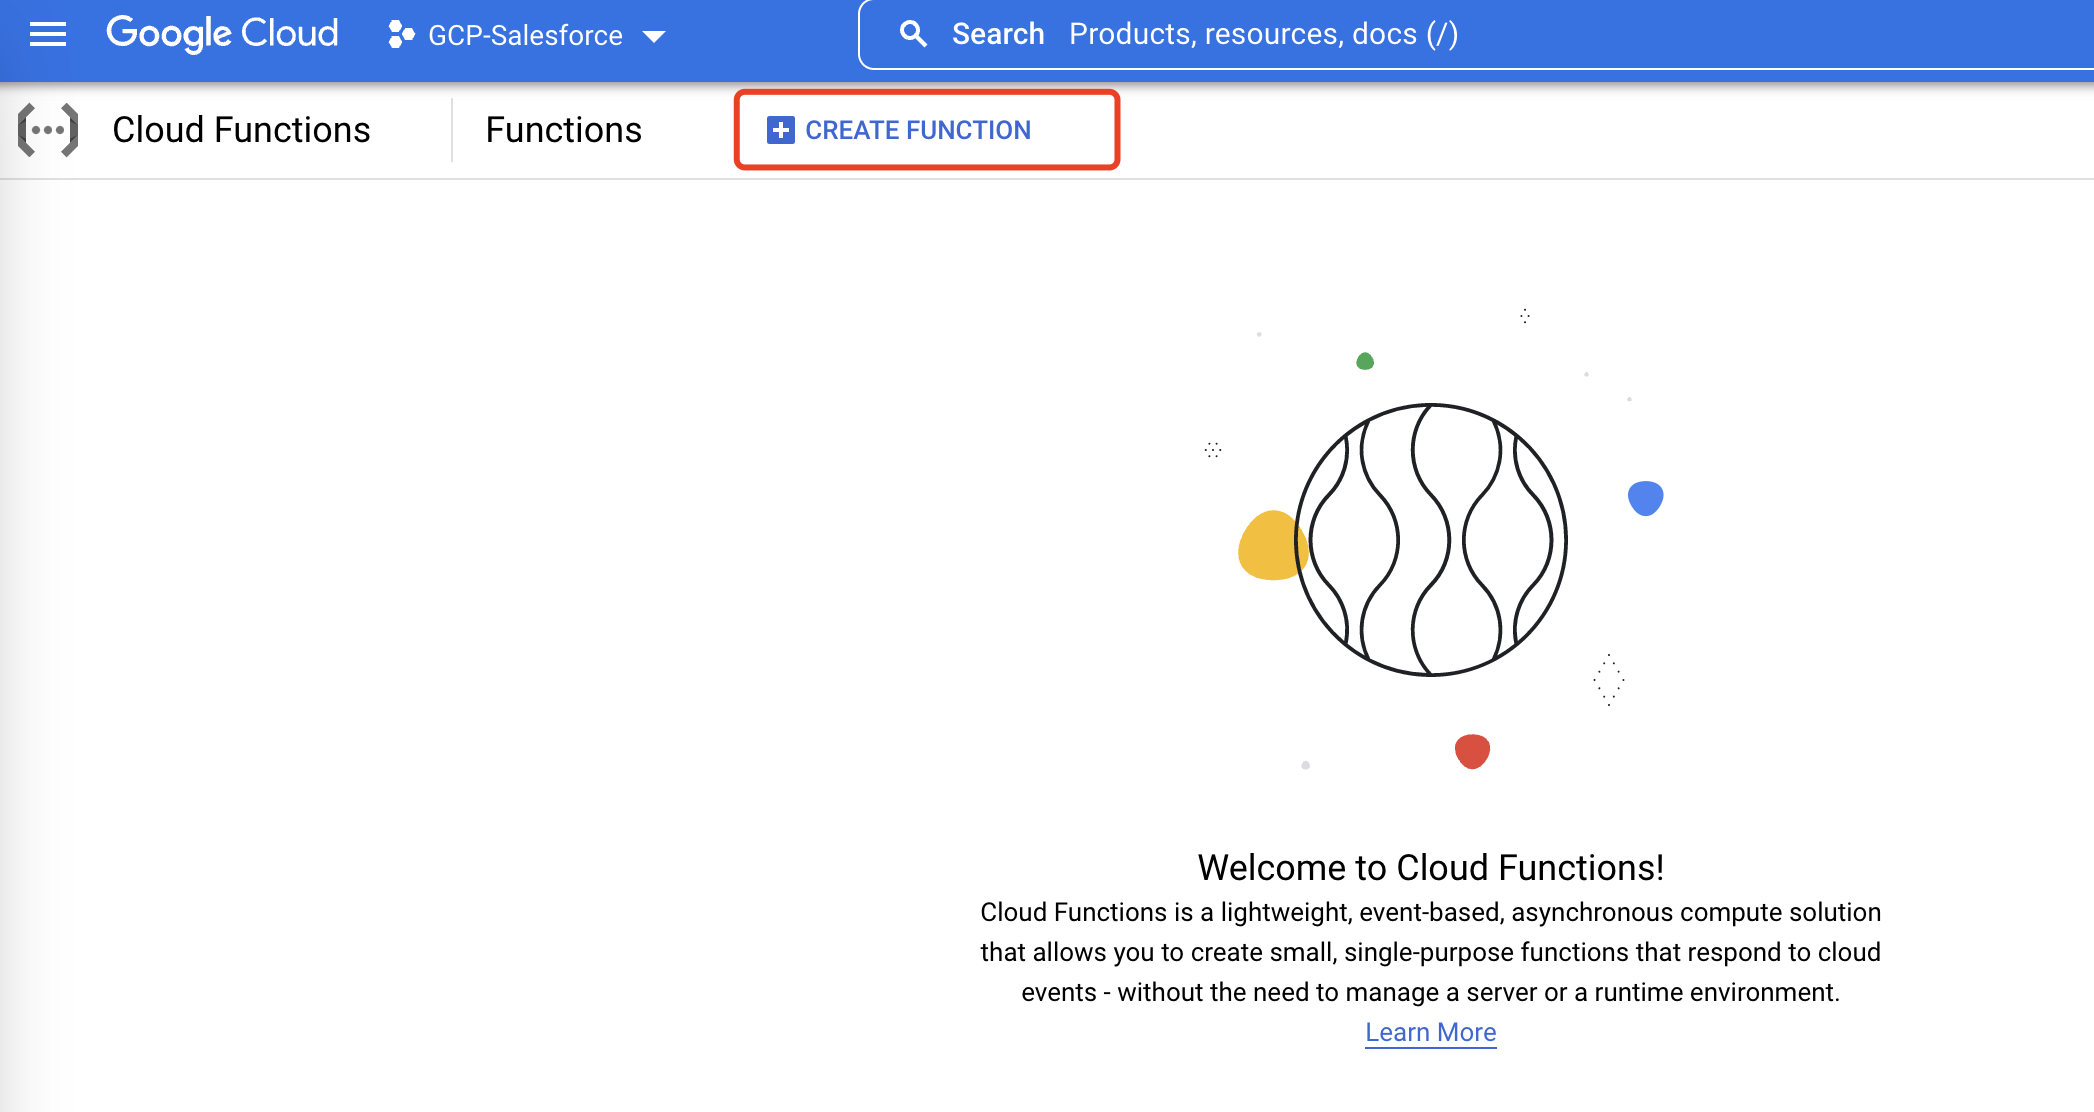
在 CLOUD FUNCTION 页面:
- Name =
salesforce-record-submission - Memory Allocated =
128 MiB - Trigger Type =
HTTP - Source Code >
Inline editor - Runtime =
Python 3.7 - 在 Main.py 编辑器中放以下内容。这是我们将从 HTTP Post 传入数据,进行 Salesforce 身份验证并将此服务中发布的数据作为新联系人提交到 Salesforce 的代码。
1
2
3
4
5
6
7
8
9
10
11
12
13
14
15
16
17
18
19
20
21
22
23
24
25
26
27
28
29
30
31
32
33
34
35
36
37
38
39
40
41
42
43
44
45
46
47
48
49
50
51
52
53
54
55
56
57
58
59
60
61
62
63
64
65
66
67
68
69
70
71
72
73
74
75
76
77
78
79
80
81
82
83
84
85
86
from simple_salesforce import Salesforce, SalesforceLogin
from simple_salesforce import SFType
from google.cloud import secretmanager
import requests
import json
import os

def main(initial_request):

    sftype_object = os.environ["sftype_object"]

    try:

        request_json = initial_request.get_json()

        print("main - print: {}".format(request_json))

        #retrieve salesforce session and instance reference
        session_id, instance = sf_login()

        record = SFType(sftype_object,session_id,instance)

        #send payload to Salesforce API
        record.create(request_json)

        #parse response from Salesforce API
        record_submit = record.describe()

        print("main - record_submit: {}".format(record_submit))

        return "Main Request Passed"

    except Exception as error:

        print('Main Error: ' + repr(error))


def sf_login():

    # Create the Secret Manager client.
    client = secretmanager.SecretManagerServiceClient()

    # Organize the Secret Keys
    sf_user_prod = "SF_USER_PROD"
    sf_pass_prod = "SF_PASS_PROD"
    sf_token_prod = "SF_TOKEN_PROD"

    # Pass in the GCP Project ID
    # This will be found on the Secret Manager > Secret > Secret Details
    # projects/[gcp_project_id]/secrets/[secret]
    project_id = os.environ["gcp_project_id"]

    # Obtain the Secret Name Path
    sf_user_prod_name = f"projects/{project_id}/secrets/{sf_user_prod}/versions/latest"
    sf_pass_prod_name = f"projects/{project_id}/secrets/{sf_pass_prod}/versions/latest"
    sf_token_prod_name = f"projects/{project_id}/secrets/{sf_token_prod}/versions/latest"

    # Obtain the Latest Secret Version
    sf_user_prod_response = client.access_secret_version(sf_user_prod_name)
    sf_pass_prod_response = client.access_secret_version(sf_pass_prod_name)
    sf_token_prod_response = client.access_secret_version(sf_token_prod_name)

    # Parse the Secret Response & Decode Payload
    sf_user_prod_secret = sf_user_prod_response.payload.data.decode('UTF-8')
    sf_pass_prod_secret = sf_pass_prod_response.payload.data.decode('UTF-8')
    sf_token_prod_secret = sf_token_prod_response.payload.data.decode('UTF-8')

    # Assign Variables to Pass into Salesforce Login
    sf_username = sf_user_prod_secret
    sf_password = sf_pass_prod_secret
    sf_token = sf_token_prod_secret

    try:

        # call salesforce Login
        # return Session ID and Instance
        session_id, instance = SalesforceLogin(
            username = sf_username,
            password = sf_password,
            security_token = sf_token)

        return session_id, instance

    except Exception as error:

        print('Login Error: ' + repr(error))
- 在 Requirements.txt 编辑器中放以下内容。这将为 Python 添加对 Requests, Simple Salesforce 和 Google Secret Manager 的依赖关系的引用。
1
2
3
4
5
6
  # Function dependencies, for example:
  # package>=version
  requests>=2.20.0
  simple-salesforce>=0.74.2
  google-cloud-logging==1.11.0
  google-cloud-secret-manager==0.2.0
- 点击
Deploy等待部署结果。
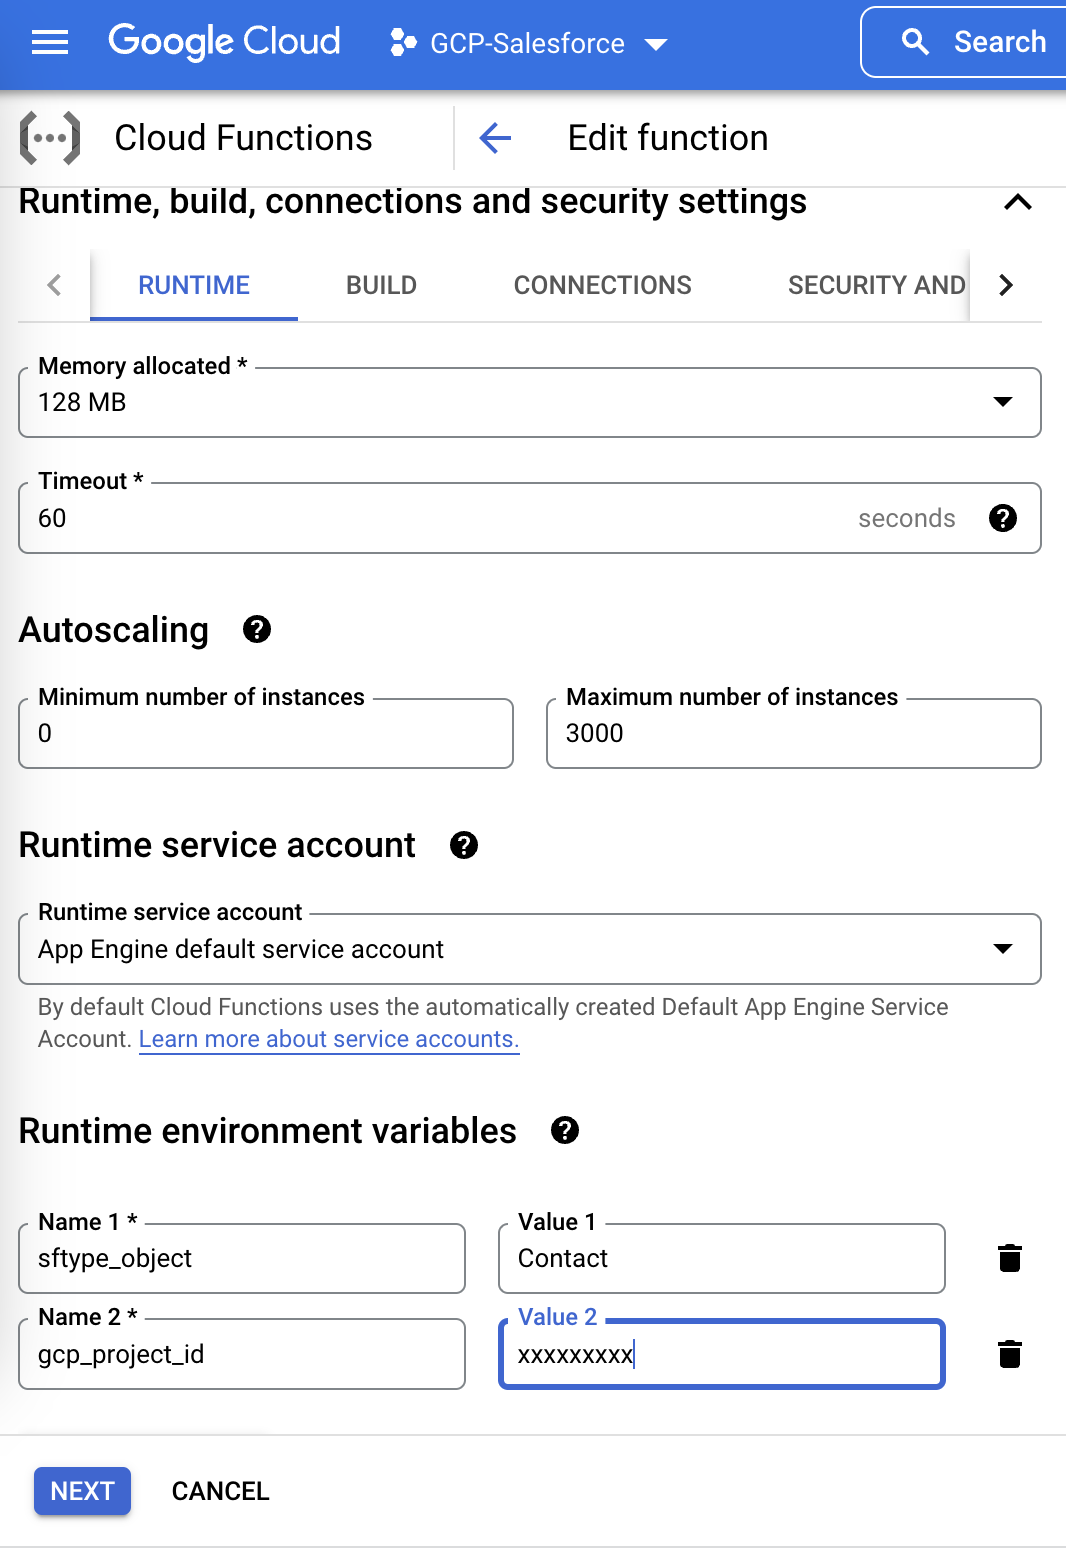
设置运行时变量:
步骤 4. 测试
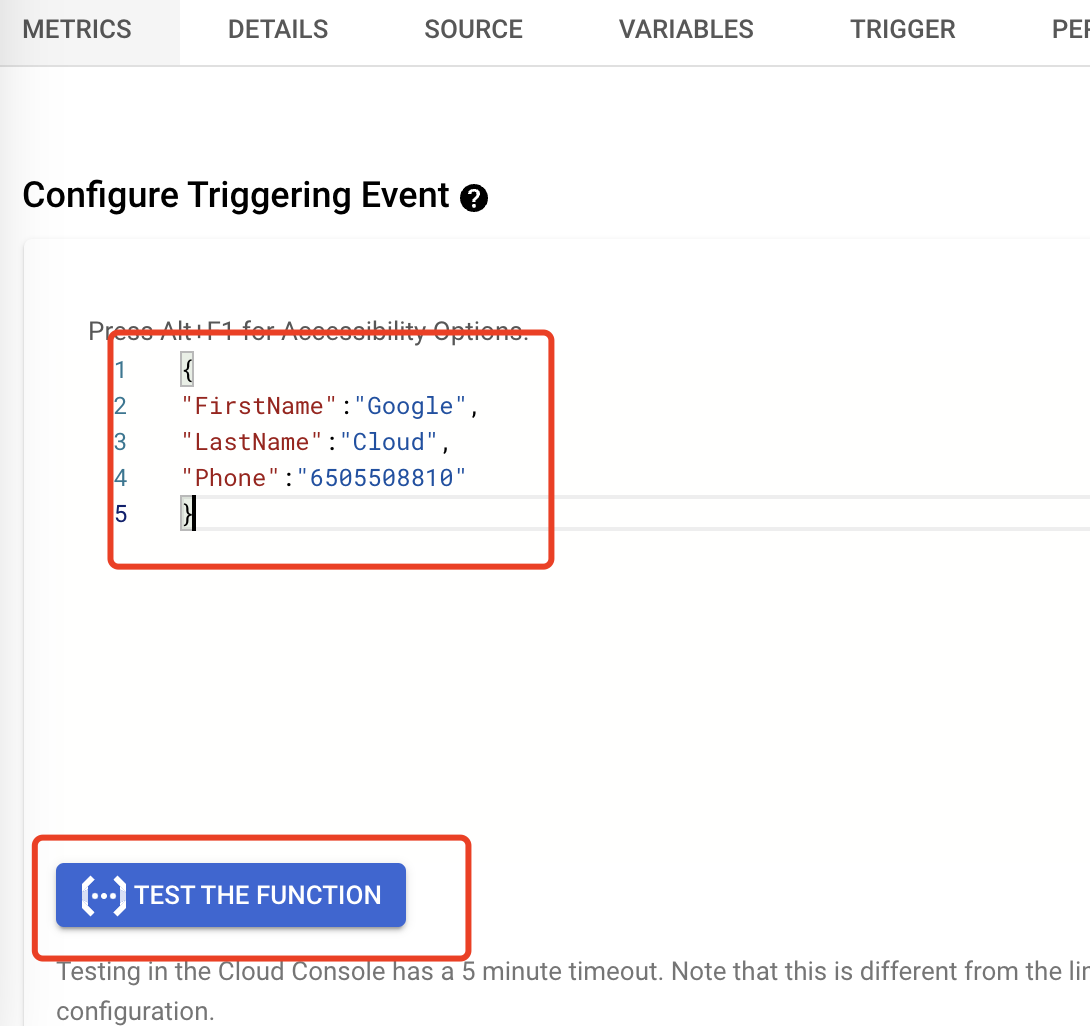
现在这个云功能已经创建完毕,现在可以测试创建一个新的联系人。在这个测试中,我们将模拟一个 HTTP Post 到这 Cloud Function,使用包含联系人信息的标准 JSON 格式。
步骤:
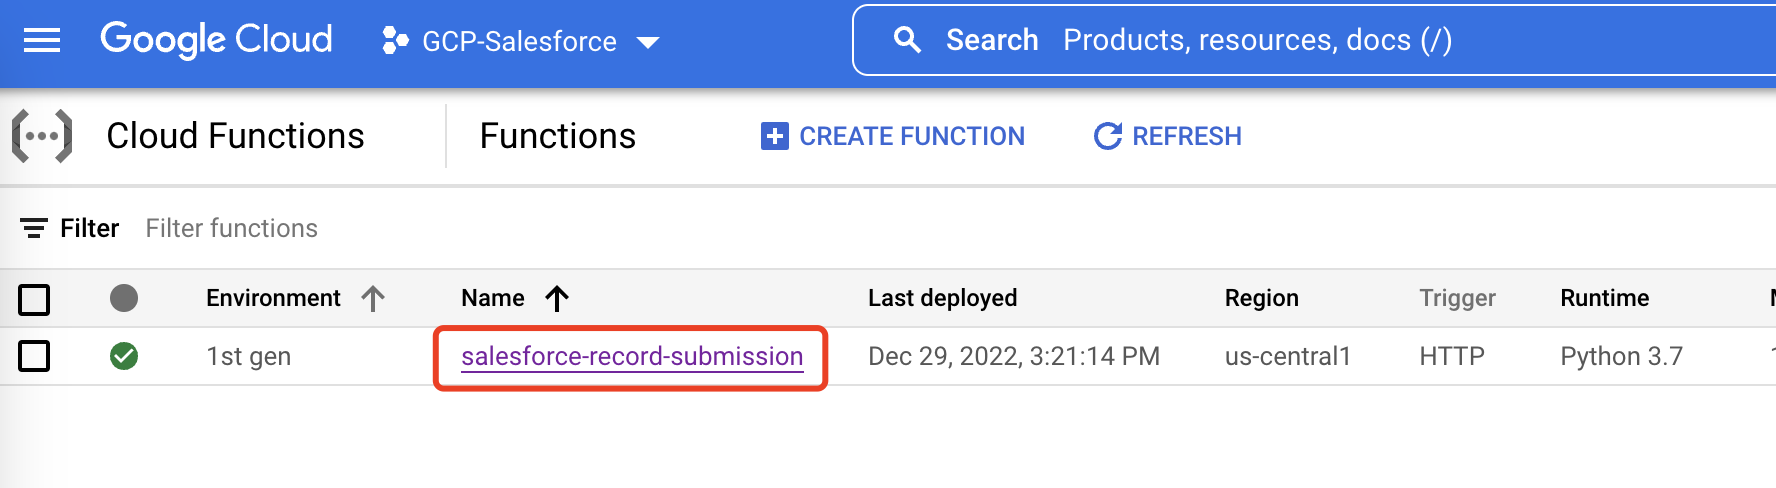
- 选中刚才创建的 Cloud Function:
-
在 Function 页面,点击
TESTINGtab
-
放入测试 JSON 数据,点击
TESTING THE FUNCTION:
查看日志:

查看 Salesforce List View: